Multiple color recognition
In the previous section, we learned Single Color Recognition. We only need to modify the code slightly on this basis to achieve multiple color recognition.
The code writing process is as follows:
Codes
CanMV K230 mini + 3.5 inch mipi lcd
'''
Demo Name:Multiple color recognition
Platform:01Studio CanMV K230
Tutorial:wiki.01studio.cc
'''

import time, os, sys

from media.sensor import * #Import the sensor module and use the camera API
from media.display import * #Import the display module and use display API
from media.media import * #Import the media module and use meida API

# Color recognition threshold (L Min, L Max, A Min, A Max, B Min, B Max) LAB model
# The following threshold tuple is used to identify the three colors red, green, and blue. Of course,
# you can also adjust it to make the recognition better.
thresholds = [(30, 100, 15, 127, 15, 127), # Red Threshold
              (30, 100, -64, -8, 50, 70), # Green Threshold
              (0, 40, 0, 90, -128, -20)] # Blue Threshold

colors1 = [(255,0,0), (0,255,0), (0,0,255)]
colors2 = ['RED', 'GREEN', 'BLUE']


sensor = Sensor() #Constructing a camera object
sensor.reset() # reset the Camera
sensor.set_framesize(width=800, height=480) # Set the frame size to LCD resolution (800x480), channel 0
sensor.set_pixformat(Sensor.RGB565) # Set the output image format, channel 0

#Use 3.5-inch mipi screen and IDE buffer to display images at the same time, 800x480 resolution
Display.init(Display.ST7701, to_ide=True)
#Display.init(Display.VIRT, sensor.width(), sensor.height()) ##Use only the IDE buffer to display images

MediaManager.init() #Initialize the media resource manager

sensor.run() #Start the camera

clock = time.clock()

while True:

    ####################
    ## Write codes here
    ####################
    clock.tick()

    img = sensor.snapshot() # Take a picture

    for i in range(3):

        blobs = img.find_blobs([thresholds[i]]) #0, 1, and 2 represent red, green, and blue respectively.

        if blobs:

            for b in blobs: #Draw rectangles, crosses and string to represent
                tmp=img.draw_rectangle(b[0:4], thickness = 4, color = colors1[i])
                tmp=img.draw_cross(b[5], b[6], thickness = 2)
                tmp=img.draw_string_advanced(b[0], b[1]-35, 30, colors2[i],color = colors1[i])


    img.draw_string_advanced(0, 0, 30, 'FPS: '+str("%.3f"%(clock.fps())), color = (255, 255, 255))

    Display.show_image(img) # Display image

    print(clock.fps()) #FPS
CanMV K230 mini + 2.4 inch mipi lcd
'''
实验名称:多种颜色识别
实验平台:01Studio CanMV K230 mini + 2.4寸mipi屏
教程:wiki.01studio.cc
'''

import time, os, sys

from media.sensor import * #导入sensor模块,使用摄像头相关接口
from media.display import * #导入display模块,使用display相关接口
from media.media import * #导入media模块,使用meida相关接口

# 颜色识别阈值 (L Min, L Max, A Min, A Max, B Min, B Max) LAB模型
# 下面的阈值元组是用来识别 红、绿、蓝三种颜色,当然你也可以调整让识别变得更好。
thresholds = [(30, 100, 15, 127, 15, 127), # 红色阈值
              (30, 100, -64, -8, 50, 70), # 绿色阈值
              (0, 40, 0, 90, -128, -20)] # 蓝色阈值

colors1 = [(255,0,0), (0,255,0), (0,0,255)]
colors2 = ['RED', 'GREEN', 'BLUE']


sensor = Sensor(width=1280, height=960) #构建摄像头对象
sensor.reset() #复位和初始化摄像头
sensor.set_framesize(width=640, height=480) #设置帧大小为2.4寸屏分辨率(640x480),默认通道0
sensor.set_pixformat(Sensor.RGB565) #设置输出图像格式,默认通道0

Display.init(Display.ST7701, width=640, height=480, to_ide=True) #同时使用3.5寸mipi屏和IDE缓冲区显示图像,800x480分辨率
#Display.init(Display.VIRT, sensor.width(), sensor.height()) #只使用IDE缓冲区显示图像

MediaManager.init() #初始化media资源管理器

sensor.run() #启动sensor

clock = time.clock()

while True:

    ################
    ## 这里编写代码 ##
    ################
    clock.tick()

    img = sensor.snapshot() #拍摄一张图片

    for i in range(3):

        blobs = img.find_blobs([thresholds[i]]) # 0,1,2分别表示红,绿,蓝色。

        if blobs:

            for b in blobs: #画矩形、箭头和字符表示
                tmp=img.draw_rectangle(b[0:4], thickness = 4, color = colors1[i])
                tmp=img.draw_cross(b[5], b[6], thickness = 2)
                tmp=img.draw_string_advanced(b[0], b[1]-35, 30, colors2[i],color = colors1[i])


    img.draw_string_advanced(0, 0, 30, 'FPS: '+str("%.3f"%(clock.fps())), color = (255, 255, 255))

    Display.show_image(img) #显示图片

    print(clock.fps()) #打印FPS
Compared with the single color recognition routine, the modified code is as follows. A for loop is added before color recognition to recognize the three preset colors:
    ...
    for i in range(3):

        blobs = img.find_blobs([thresholds[i]]) #0, 1, and 2 represent red, green, and blue respectively.

        if blobs:

            for b in blobs: #Draw rectangles, crosses and string to represent
                tmp=img.draw_rectangle(b[0:4], thickness = 4, color = colors1[i])
                tmp=img.draw_cross(b[5], b[6], thickness = 2)
                tmp=img.draw_string_advanced(b[0], b[1]-35, 30, colors2[i],color = colors1[i])
    ...
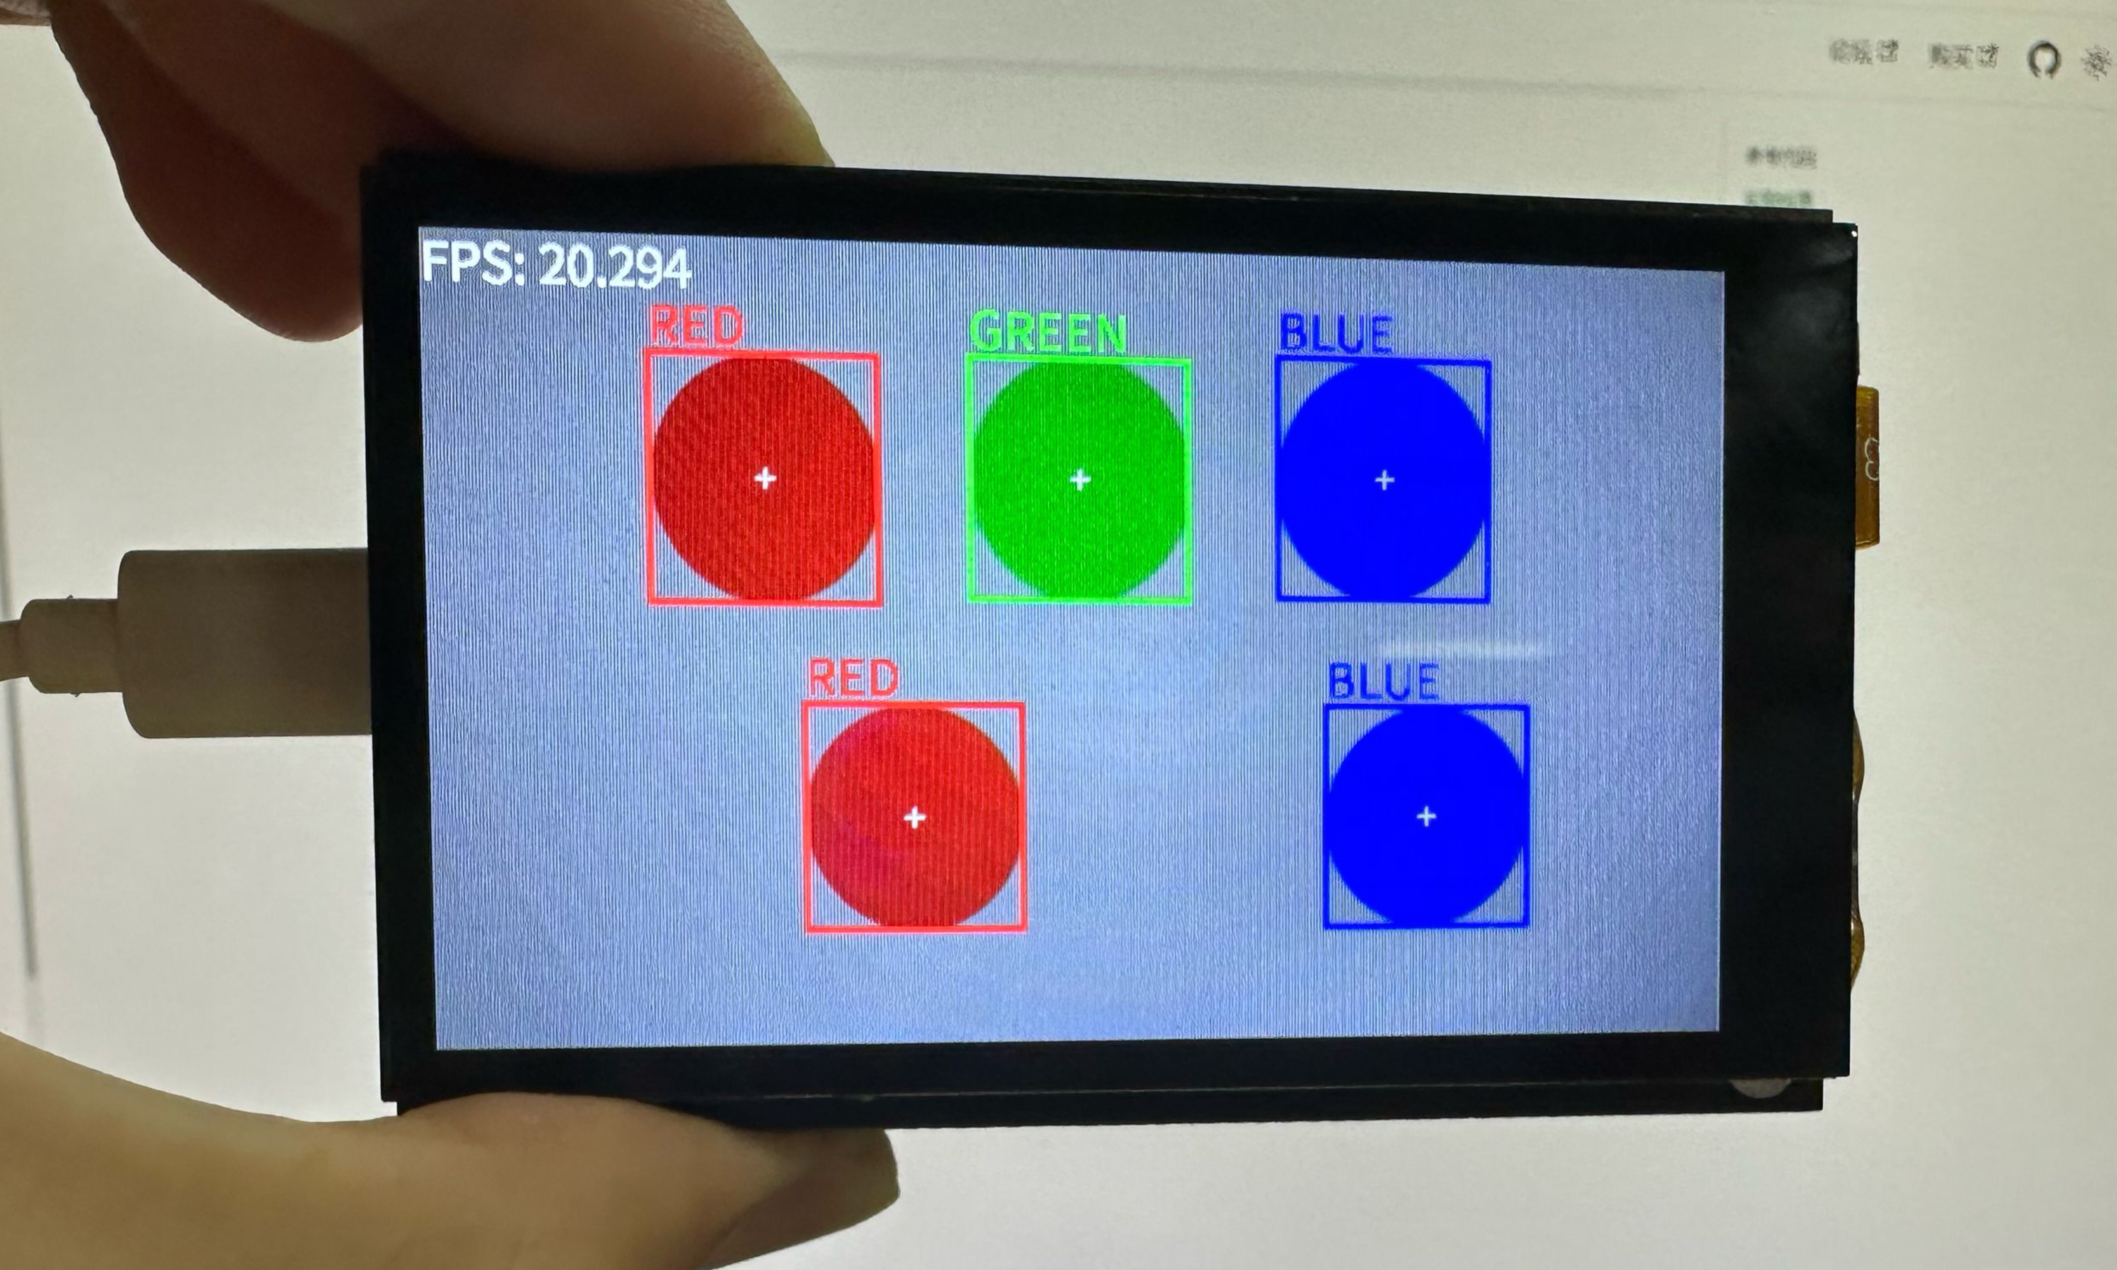
Experimental Results
Running various color recognition codes, we can see the following experimental results, all colors are recognized:
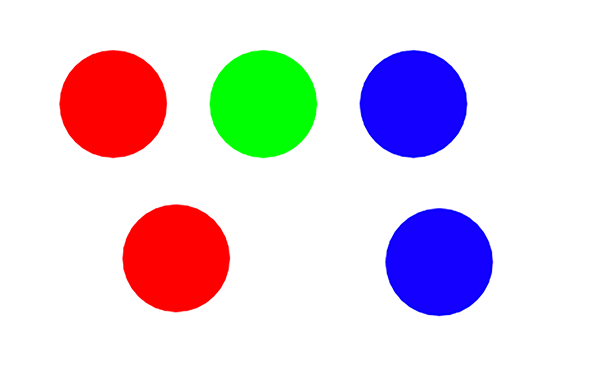
Original image:
Identification results: