人体检测
前言
人体检测是判断摄像头画面中有无出现人体,常用于人体数量检测,人流量监控以及安防监控等。
实验目的
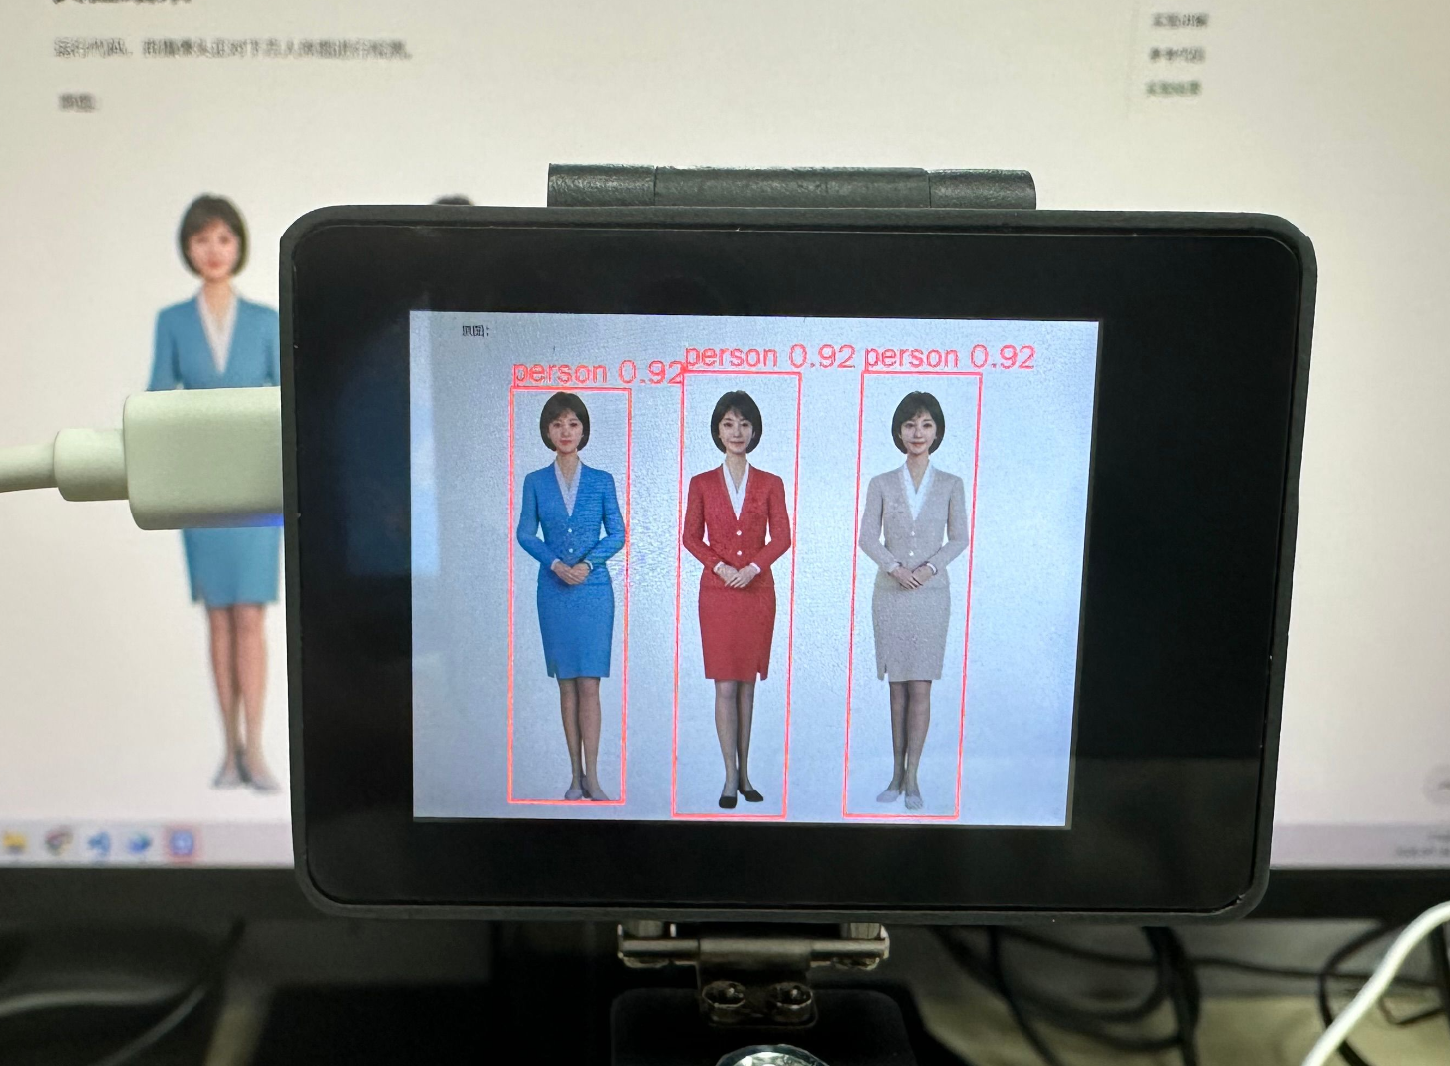
将摄像头拍摄到的画面中的人体检测出来并通过画框提示。
实验讲解
人体检测模型已经预先训练好,存放在代码同一目录下,我们只需要加载模型文件,使用kpu库进行推理,并将返回的结果画图并显示即可。
具体编程思路如下:
参考代码
'''
实验名称:人体检测
实验平台:CyberCAM
说明:单个或多个人体检测
'''

import cv2, time, os, colorsys
from walnutpi import kpu, Display, Sensor, IDE, direction

# 优先当前文件夹下相对路径(app离线部署)
if os.path.exists("./person_detect_yolov5n.kmodel"):
    model_path = "./person_detect_yolov5n.kmodel"

# 使用系统绝对路径(IDE运行调试)
elif os.path.exists("/data/app/person-det/person_detect_yolov5n.kmodel"):
    model_path = "/data/app/person-det/person_detect_yolov5n.kmodel"

else:
    raise FileNotFoundError("模型文件缺失,请检查当前路径与系统路径下的模型文件是否存在。")

model_size = 640 #模型尺寸
detector = kpu.PERSON_DETECT(model_path, model_size) # 加载模型

labels = [ 'person' ]

#字符显示改进,支持中英文显示
ft = cv2.freetype.createFreeType2() #创建freetype渲染器
ft.loadFontData("/usr/share/fonts/truetype/wqy/wqy-zenhei.ttc", 0) #加载字体文件, 文泉驿正黑

def putText_Chinese(img, text, org, fontScale=30, color=(0, 255, 0)):

    global ft  # 使用全局的 FreeType 渲染器实例

    # 绘制中文
    ft.putText(
        img=img,
        text=text,
        org=org,
        fontHeight=fontScale,
        color=color,
        thickness=-1,        # 笔画粗细
        line_type=cv2.LINE_AA,  # 抗锯齿,文字更平滑
        bottomLeftOrigin=True  # False:坐标为左上角; True:与原生cv2.putText一致(左下角)
    )
    return img

# 初始化屏幕
Display.init()

# 初始化摄像头
cap = Sensor.Sensor(640, 480)
if not cap.isOpened():
    print("Cannot open camera")
    exit()

#获取当前显示屏方向,0表示默认,2表示180度翻转。
lcd_dir=direction.get_lcd()
#print(lcd_dir)

# 判断显示屏是否翻转,如果翻转,则设置显示旋转180°,摄像头同时设置为前置模式(水平镜像)
if lcd_dir == 2: #翻转了
    Display.set_rotation(2)
    cap.set_hmirror(1)

# ========== FPS计算 ==========
frame_count = 0       # 帧数计数器
start_time = time.time()
fps = 0.0

while True:

    # 摄像头读取一帧
    ret, img = cap.read()

    # 阻塞式目标检测
    boxes = detector.run(img, 0.5, 0.45)

    # 输出检测结果
    for box in boxes:
        print(
            "{:f} ({:4d},{:4d}) w{:4d} h{:4d} {:s}".format(
                box.reliability,
                box.x,
                box.y,
                box.w,
                box.h,
                labels[box.label],
            )
        )

    # 绘制检测框和中文标签
    for box in boxes:

        FONT_SIZE = 30 # 字体大小

        color =  (0, 0, 255)
        label_text = f"{labels[box.label]} {box.reliability:.2f}"

        left_x = int(box.x)
        left_y = int(box.y)
        right_x = int(box.x + box.w)
        right_y = int(box.y + box.h)

        # 获取文字尺寸
        (label_width, label_height), baseline = ft.getTextSize(label_text, FONT_SIZE, -1)

        # 防止标签超出图像顶部
        text_y = left_y - baseline - 5
        bg_y1 = left_y - label_height - baseline
        if bg_y1 < 0:
            bg_y1 = 0
            text_y = label_height + 5

        # 画检测框
        cv2.rectangle(img, (left_x, left_y), (right_x, right_y), color, 2)

        #输出字符
        putText_Chinese(img, label_text, (left_x + 5, text_y), fontScale=FONT_SIZE, color=color)

    # 每满1秒计算一次平均FPS
    frame_count += 1
    current_time = time.time()
    if current_time - start_time >= 1.0:
        fps = frame_count / (current_time - start_time)
        frame_count = 0              # 重置帧数计数器
        start_time = current_time    # 重置计时起点
        print("FPS: ", f'FPS: {fps:.1f}')

    #FPS显示
    #putText_Chinese(img, f'FPS: {fps:.1f}',  (10, 30), fontScale=30, color=(0, 255, 0))

    # 显示图像
    Display.show(img)
    IDE.show(img)
实验结果
运行代码,将摄像头正对下方人体图进行检测。
原图:

识别结果: